SEO Guides, Tips & More!
Learn from Our Experience
Launching a New Site?
The day you’ve been working toward for weeks (or maybe months) is almost here: Launch Day. The website redesign has been a labor of love but make no mistake on the labor part. Countless iterations of the new site map, approvals for visual design and layout, then the waiting period while the company’s new website is coded. The new website is in good company: WordPress powers at least 33 percent of all websites, depending on which market segment is examined. Even though you’re anxious to tell the developer to go ahead and launch the new site, check out this blog first. There are many little things that should be reviewed prior to launching the site. Make sure to cross off each of these items off first before the new website is published. It will ensure the post-launch work goes much smoother and reduces the headaches one may experience.
Technical Details
The following technical details may have already been addressed by the developer, but it’s a good idea to double-check. It will save time later if anything needs to be fixed now, and search engines will be able to index your site easier with these items in place.
Favicon
A favicon is a small graphic associated with your website, usually either a version of your logo or the first letter of your firm. It’s a branded element that will appear in the browser address bar (depending on the browser), in the tabbed interface of open pages, and in the history or bookmarked pages.
![]()
![]()
Page Titles and Meta Data
This is especially important if many pages on your website or blog were copied over. The page title and metadata for each page need to be tailored to fit that page’s content. See how the correct page title and metadata will appear in search engine results below.

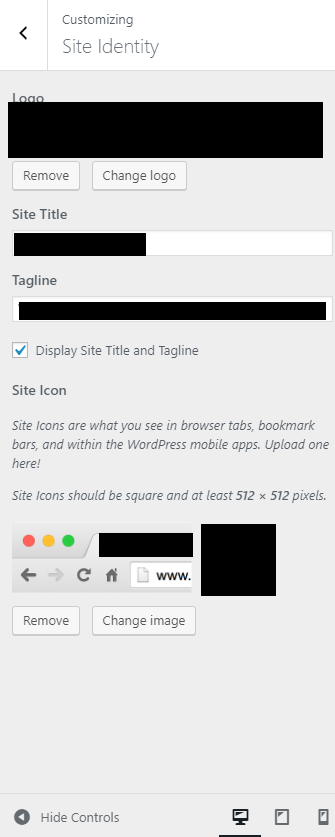
This can be done manually in the back end by either you or the developer. To edit the site title, favicon, and tagline in WordPress, click on Appearance, then Customize. Once your site pops up with an editing menu on the left side, click on Site Identity. In Site Identity, you can change or upload your favicon (WordPress calls it a logo here), update your site title, and edit your site’s tagline. Remember to view the changes on a desktop, tablet, and mobile – the icons at the bottom of the editing menu will allow you to see how your changes look on each device.
To edit individual page titles and descriptions, you have to manually update each page. Time-intensive depending on the site, but not difficult, and it pays dividends in SEO indexing. When you click on Edit Page, scroll to the bottom. Look for Snippet Preview. This is how a page will appear on Google search results. Google will automatically pull whatever information it feels is important, but if you want to maximize your opportunity for SEO, edit it.
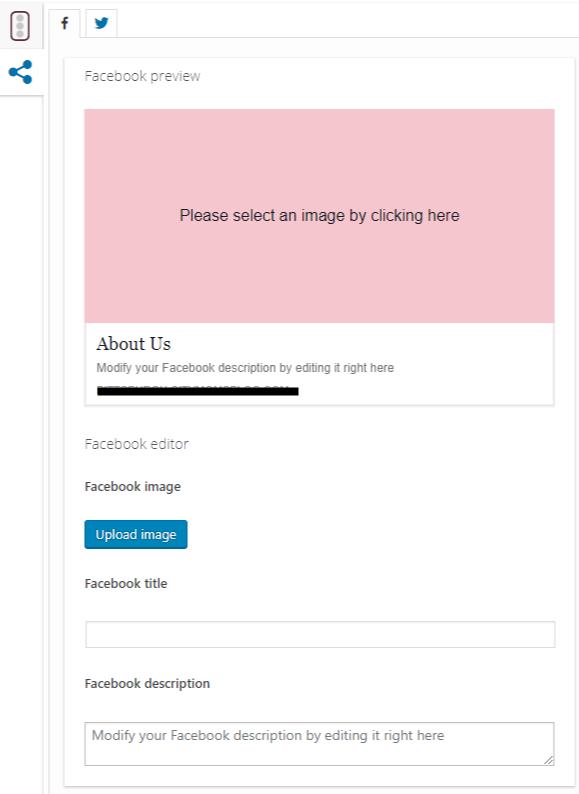
Note that it’s possible to change the page title, image, and page description for your linked social media accounts, too. You will need to install the Yoast SEO plug-in to do this, but you would have needed to install it anyway.
Also useful in WordPress, your page title doesn’t have to be the same as its URL. If you want the URL to stand out, change the permalink at the top of Edit Page.

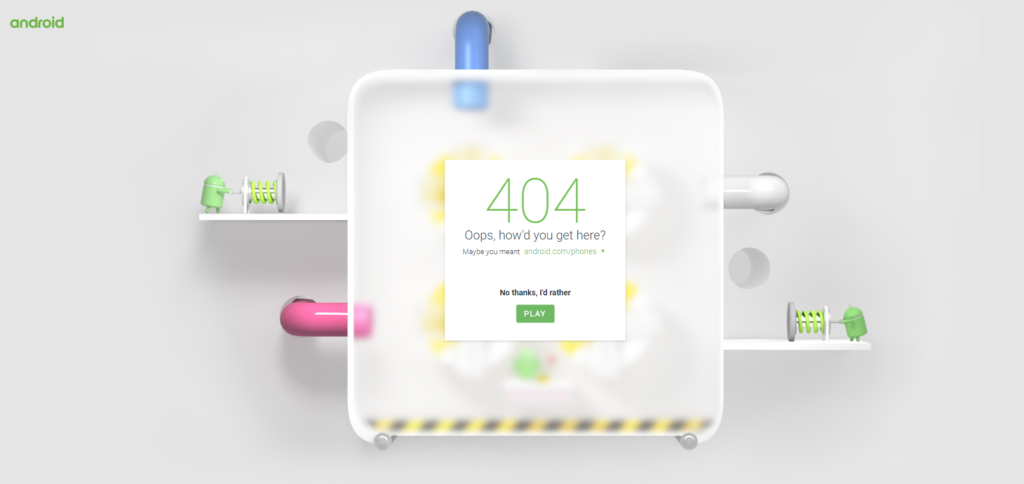
404 Error Page
The 404 page can be a surprising way to brand your firm, believe it or not. Sooner or later, a user will click on a broken link going to or on the site and end up getting an Error 404: Page Cannot Be Found. Beyond the standard error message and link to your homepage, consider developing a branded 404 page. Some examples are below.

Google Plug-Ins
There are a few important Google plug-ins that a site will need before it’s launched to ensure it functions well and is easily indexed. These are the top plug-ins you shouldn’t go without. It’s best if the developer installs these so you don’t have to worry about the details, but they can be installed post-launch by the team if needed.
After your site launches, you can enter the URL into Google Search Console to check the website’s indexing status. You will also be able to see how your site is optimized across platforms and confirm that your site is, in fact, indexed on Google. (We have heard from some marketing teams that their firm’s partners want to know how to tell if the site is searchable because they couldn’t find it when doing their own Google search. This is how to tell, and troubleshoot, if necessary.)
Google Analytics
We recommend you install Google Analytics before launching your site. Hopefully, you already had Google Analytics installed on your previous site, but if not, go to analytics.google.com and follow the steps to sign up. You’ll get a tracking ID and code unique to your site. Installing Google Analytics can be done by your developer (preferred) or manually using WordPress plug-ins. Your developer will make sure the tracking code is inserted everywhere it needs to be. Remember that it will take some time for Google to pick up your new site, so don’t worry if it’s not indexing right away.
Google XML Sitemaps
You already spent a ton of time configuring your new sitemap. Make sure it’s added to your website via a .xml file in the root directory so Google can easily index the site. The Google XML Sitemaps plug-in will automatically update any time you add a new page to your site.

Other Google functionality plug-ins one should consider installing include:
Next up, the functional aspects of your new website. Even though you probably combed through the pages dozens of times, do a final check of these items before the site launches. It’s much better to troubleshoot using the beta site than it is to put out fires after it’s published.
Next up, the functional aspects of your new website. Even though you probably combed through the pages dozens of times, do a final check of these items before the site launches. It’s much better to troubleshoot using the beta site than it is to put out fires after it’s published.
Housekeeping for the New Website
These can all be considered basic housekeeping items, but can be overlooked often, especially when you’re rushing to meet a deadline.
Settings
The settings area of your WordPress dashboard is an important area to become familiar with. Under General Settings you can edit the site name and tagline (see above for an alternative method), time zone and date format (important for publishing blogs). Media Settings allow you to edit the maximum media file sizes, useful for uploading images to blog posts. WordPress keeps a rather small maximum pixel size by default, so consult with your developer on appropriate settings here.
Link Checker is a built-in WordPress function that monitors your website for broken links. Check it often in the first several weeks of launching your site.
To change the email address for the site itself, go to Settings and then General Settings. To update the email address for specific users, go to Users. Then, can add, delete, or edit user information, including but not limited to the email address and role.
Don’t forget to save any changes you want to keep.

Social Media – SUBHEADING
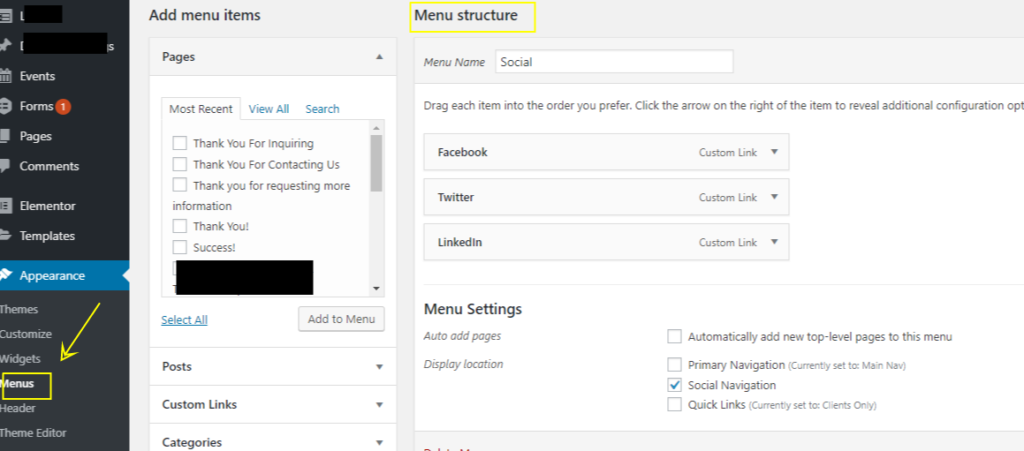
Most WordPress sites integrate automatically with social media (remember from earlier, though – you’ll need to install the Yoast SEO plug-in to fully optimize social media on your site). The icons are there, but where are they pointing? The default destination is the network’s home page. To update the landing pages, first make sure you’re in your site’s main WordPress dashboard. Then, go to Appearance, and Customize. When the site appears with the menu on the left, click on Menus, then Social. Here, you’ll be able to customize the specific URL you want each social icon to point to. You can also reorder the icons if you want to. Tip: Put the social icons in order of your most active networks, or by order of the network with the most followers.
Insert screenshot6.png
Alternatively, you can also edit the URLs of the social networks by clicking on Appearance, then Menus, then select the Social Media menu to edit.
This process might look slightly different depending on which version of WordPress you have or how your developer set up your site.
Forms
The best websites will act as inbound marketing funnels and will be designed to attract new leads. When someone submits a form, inquiry, or request for proposal on your site, their message needs to get through to an actively monitored email address. Do a test of every form on your site to make sure the message gets through.
Top-rated forms plug-ins for WordPress are WPForms, Formidable Forms, and Contact Form 7. Google also has a plug-in for Forms and your developer can and should guide you in the best option for your site.


Proofread and Test
Sometimes, when you’re close to the content for weeks or months, you tend to miss things. We’re all human and a second set of eyes never hurt, so have someone else proofread every page. You may have spent too much time looking at all the content to notice if there’s a typo.
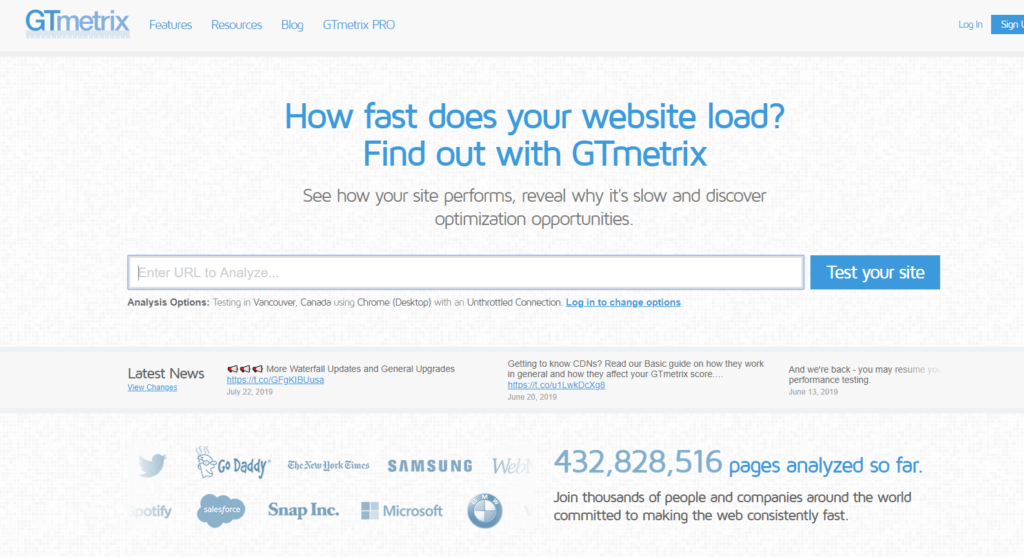
Check all the images, sliders, and videos on multiple formats to ensure they’re loading properly and look the way they should. Finally, check page speed loading time. If any page on your website takes longer than a couple of seconds to load, you’re going lose visitors. This is an important point for SEO too because Google has stated that page load time is a “light” ranking factor. Check out the sites load time at gtmetrix.com, they have a handy tool that provides a ton of useful information.
And finally, make sure your developer has a back-up of the site. Also talk to your web host to find out how often the site is backed up, where it is stored, and how to access it should you ever need to. Hackers are just one cause of crashed sites; user error can cause a lot of problems and a frequently backed up website can prevent disasters.
Practical Insights
Check out the advice of those in the field
 “Be sure to promote the new site within your own firm. Your team members are your best ambassadors, so involve them in the excitement. Don’t just send an internal email announcing the new site. Instead, make posters, leave something on their desks, create a contest, make it easy for them to share on social media.”
JoLayna Arndt, Director of Marketing
Clear for Launch
Launching a new website is a big accomplishment and seeing the finished product live is a testament to the hard work you and your team did. By taking a little extra time before the final site is published, you will have the peace of mind knowing that every issue was examined, and your firm’s new online presence will be flawless from day one.
What has been your experience launching a WordPress site? If you have other items to add to our pre-launch checklist, tell us in the comments below!